Blog

Organizing Your Climbing Backpack: Packing Systems for Quick Access
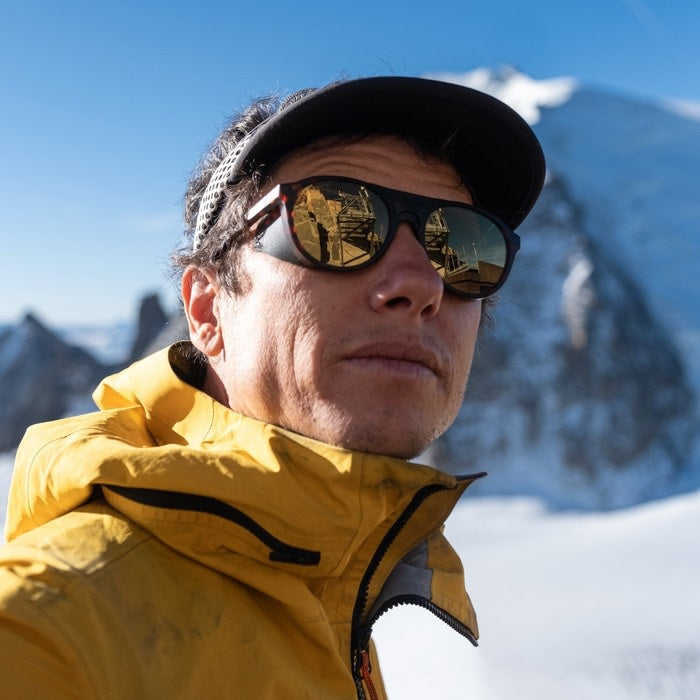
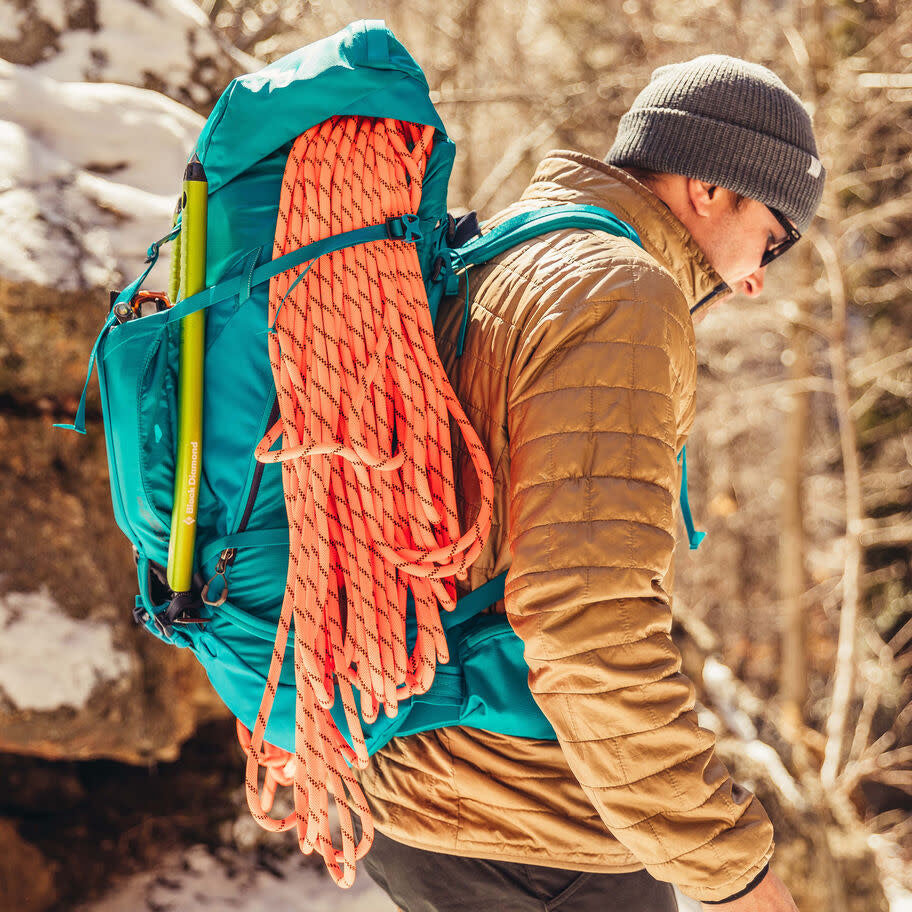
Picture this: you're three pitches up a multi-pitch route, the weather is deteriorating, and you need to access your headlamp quickly as daylight fades. You reach into your pack only to find a jumbled mess of gear where your carefully planned organization has devolved into chaos. This scenario highlights a critical truth about climbing: efficient pack organization isn't just about convenience—it's about safety, speed, and maintaining focus when it matters most. Proper backpack organization transforms your climbing experience from frustrating gear searches to seamless equipment access. Whether you're tackling single-pitch sport routes or embarking on multi-day alpine adventures, implementing proven packing systems will enhance your efficiency, reduce stress, and ultimately make you a better, safer climber. The Psychology of Pack Organization Before diving into specific techniques, it's crucial to understand that effective pack organization is both an art and a science. Your packing system should be intuitive enough that you can find essential items even when tired, stressed, or operating in low-light conditions. The best organizational systems become second nature, allowing you to retrieve gear without conscious thought. Successful climbers develop muscle memory for their pack layout, knowing exactly where each piece of equipment lives. This systematic approach reduces decision fatigue during critical moments and ensures that safety equipment is always within immediate reach. Core Principles of Climbing Pack Organization 1. Frequency-Based Accessibility The fundamental rule of climbing pack organization is simple: items you need most frequently should be the easiest to access. This means creating distinct zones within your pack based on how often you'll need specific gear throughout your climbing day. Immediate Access Zone (External pockets and top compartments): Water and snacks Sunscreen and lip balm First aid essentials Headlamp Multi-tool or knife Frequent Access Zone (Upper main compartment): Extra layers (insulation, rain gear) Climbing shoes (if approaching in hiking boots) Route topos and guidebooks Camera or phone Occasional Access Zone (Lower main compartment): Backup clothing Sleeping gear (for multi-day trips) Emergency bivvy equipment Extra food and cooking supplies 2. Weight Distribution Strategy Proper weight distribution affects both comfort and climbing performance. The ideal arrangement keeps heavier items close to your back and centered between your shoulder blades, creating a stable load that won't shift during movement. Heavy items (close to back, middle height): Water reservoirs or bottles Climbing shoes Approach shoes Dense food items Medium weight items (outer areas, strategic placement): Clothing layers Sleeping systems Cooking equipment Light, bulky items (away from back, top or bottom): Sleeping pads Empty stuff sacks Lightweight synthetic insulation This distribution principle becomes especially critical when using fast & light backpacks where every ounce and its placement matters for performance. Compartment-Specific Organization Systems Main Compartment Layering The main compartment should function like a well-organized dresser drawer, with distinct layers that don't interfere with each other during retrieval. Bottom Layer Foundation: Start with your heaviest, least-accessed items at the very bottom. This typically includes sleeping bags, extra food for multi-day trips, or backup gear. Use compression sacks to minimize volume and create a stable foundation for other items. Core Layer Setup: The middle section houses your daily essentials—extra clothing layers, climbing shoes, and lunch. Pack these items in stuff sacks or packing cubes for easy identification and removal without disrupting other gear. Top Layer Accessibility: Reserve the top portion for items you might need during the day: rain gear, warm layers, or camera equipment. These should be packed in bright-colored stuff sacks for quick visual identification. External Organization Mastery External pockets and attachment points are your quick-access command center. Each external zone should have a specific purpose and consistent organization. Side Pockets Strategy: One side for hydration (water bottles, electrolyte supplements) Opposite side for approach snacks and energy foods Dedicated loops for trekking poles or ice axes Hip Belt Pocket System: Left pocket: high-energy snacks and lip balm Right pocket: phone, route beta, small first aid items Both pockets should be accessible while wearing gloves Top Lid Organization: Front pocket: sunscreen, sunglasses, keys Back pocket: maps, permits, emergency cash Main lid compartment: first aid kit and emergency supplies Gear-Specific Packing Techniques Climbing Hardware Organization Your rack organization can make or break your climbing day efficiency. Develop a system that allows quick gear selection without fumbling through tangled hardware. Rack Management Options: Gear slings: Organize by size/type on padded slings Dedicated gear compartments: Some climbing backpacks feature specialized hardware pockets External attachment systems: Use daisy chains for frequently accessed pieces Hardware Packing Tips: Keep carabiners gated consistently (all gates facing the same direction) Separate active protection from passive protection Use bright-colored slings for easy identification Pack spare hardware in easily accessible exterior pockets Rope and Protection Systems Rope management significantly impacts your climbing efficiency and safety. Whether you're carrying a single climbing rope or a full alpine rack, systematic organization prevents tangles and ensures quick deployment. Rope Packing Methods: Butterfly coil: Classic method for external carry Backpack coil: Coiled and stuffed into main compartment Rope bag integration: Some packs feature dedicated rope attachment systems For alpine routes requiring extensive protection, consider packs designed specifically for mountaineering applications, such as those in our ski mountaineering collection that accommodate both climbing and snow safety equipment. Seasonal and Discipline-Specific Adaptations Alpine and Multi-Pitch Organization Multi-pitch and alpine routes require more complex organization systems due to extended duration and varied conditions. Alpine-Specific Considerations: Weather protection for all gear compartments Quick access to layers for temperature regulation Organized belay station supplies (snacks, water, warm layers) Emergency equipment readily accessible Multi-Pitch Packing Priority: Belay jacket in external pocket for quick access Water and snacks in hip belt pockets Headlamp and emergency supplies never buried deep Winter and Ski Mountaineering Cold weather climbing introduces additional organizational challenges, from bulky insulation to avalanche safety equipment. Winter-Specific Systems: Insulation layers in compression sacks for space efficiency Avalanche safety gear in dedicated, easily accessible compartments Backup warmth items (extra gloves, hat) distributed throughout pack Equipment that can freeze (batteries, water) kept close to body Our avalanche airbag backpacks integrate specialized compartments for avalanche safety equipment while maintaining efficient organization for climbing gear. Technology Integration and Modern Solutions Hydration System Integration Modern climbing packs feature sophisticated hydration integration that goes beyond simple reservoir pockets. Hydration Optimization: Insulated tube routing to prevent freezing Quick-disconnect systems for easy refilling Backup water bottle storage for redundancy Electrolyte tablet organization for long days Electronic Device Management Today's climbers carry more electronic devices than ever before, requiring dedicated organizational strategies. Device Protection and Access: Waterproof cases for phones and GPS units Battery pack storage with easy charging access Headlamp and backup light organization Emergency communication device accessibility Creating Your Personal System The most effective packing system is one tailored to your specific climbing style, preferred routes, and personal habits. Start with these proven principles, then adapt based on your experiences. System Development Process: Analyze your climbing style: Sport climbing, traditional routes, alpine objectives each have different organizational needs Inventory your gear: List everything you typically carry and categorize by access frequency Test and refine: Practice your system at home, then adjust based on field experience Document your system: Create a mental or physical checklist to maintain consistency Whether you prefer the minimalist approach suitable for fast & light packs or need the comprehensive organization of full-featured hiking backpacks for approach-heavy objectives, the key is developing a system that becomes intuitive through repetition. Maintenance and System Evolution Your organizational system should evolve with your climbing progression and changing objectives. Regularly assess what works and what doesn't, making adjustments based on recent climbing experiences. System Maintenance Tips: Conduct post-climb gear reviews to identify organizational inefficiencies Seasonal system adjustments for changing conditions and objectives Regular gear inventory to eliminate redundant or unnecessary items Practice pack organization at home to maintain muscle memory Integration with Pack Design The effectiveness of any organizational system depends heavily on choosing a backpack designed to support systematic packing. Our comprehensive guide on Technical Features Every Climbing Backpack Should Have details the specific design elements that facilitate efficient organization, while Backpack Fit and Sizing for Climbers: Comfort Meets Performance ensures your organizational system works with proper pack fit and weight distribution. Consider exploring our full backpack collection to find models specifically designed for your climbing objectives, whether that's technical single-pitch routes or extended backcountry adventures requiring travel bags for gear transport. Mastering Efficiency Through Organization Efficient pack organization transforms climbing from a gear-management struggle into a fluid, enjoyable experience. By implementing these systematic approaches and adapting them to your personal climbing style, you'll spend less time searching for equipment and more time focused on the rock ahead. Remember, the best organizational system is the one you'll actually use consistently. Start simple, practice regularly, and refine based on real climbing experiences. Your future self—standing at a belay station in fading light—will thank you for the time invested in developing these essential skills. Ready to optimize your climbing setup? Explore our collection of thoughtfully designed climbing backpacks and discover how proper gear organization can elevate every vertical adventure.
Learn more
Backpack Fit and Sizing for Climbers: Comfort Meets Performance
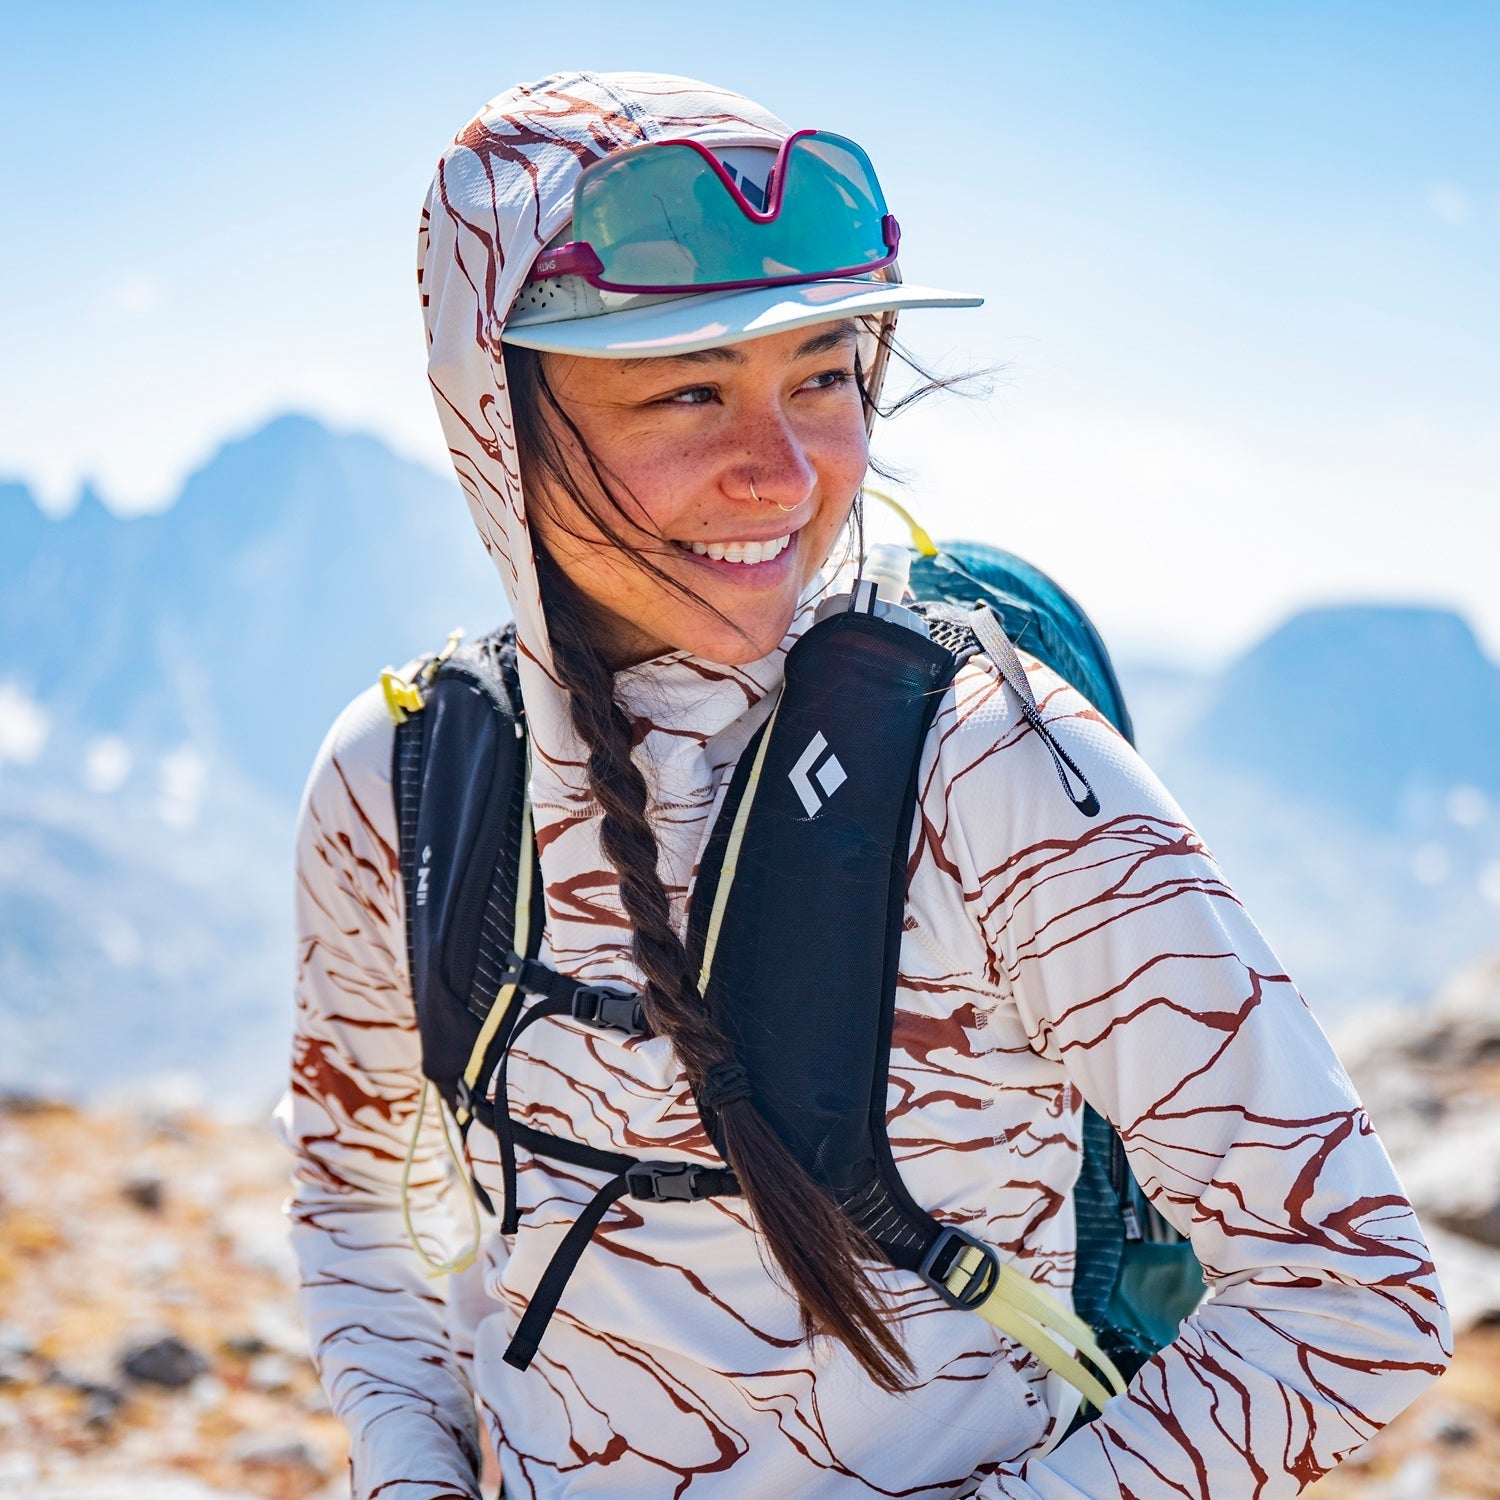
The difference between a perfect climbing day and a miserable slog often comes down to one critical factor: how well your backpack fits. While climbers obsess over the latest harness technology or rope innovations, many overlook the fundamental importance of proper backpack fit. A poorly fitted pack can transform even the most technically advanced backpack into a source of pain, fatigue, and distraction that compromises both your performance and safety on the rock. For climbers, backpack fit goes beyond basic comfort. The unique demands of vertical terrain—dynamic movements, technical body positioning, and extended periods of physical exertion—require a pack that moves as one with your body. When your backpack fits correctly, it becomes an extension of yourself, allowing you to focus entirely on the climbing challenges ahead rather than fighting against uncomfortable gear. Understanding the principles of proper backpack fit and sizing will revolutionize your climbing experience, whether you're tackling single-pitch sport routes or embarking on multi-day alpine adventures. This comprehensive guide will help you achieve the perfect balance of comfort and performance that serious climbers demand. Understanding Torso Length vs. Backpack Size The most critical measurement for backpack fit isn't your height, weight, or even shoulder width—it's your torso length. This measurement, from the base of your neck to the top of your hip bones, determines which backpack size will provide optimal load transfer and comfort. Measuring Your Torso Length To accurately measure your torso length, follow this step-by-step process: Find your C7 vertebra: Tilt your head forward and locate the prominent bone at the base of your neck Locate your iliac crest: Place your hands on your hips with thumbs pointing backward—your thumbs should rest on the iliac crest Measure the distance: Have someone measure from your C7 vertebra down to the imaginary line connecting your iliac crests Most climbing backpacks come in small (15-17 inches), medium (17-19 inches), and large (19+ inches) torso lengths, though sizing can vary between manufacturers. Common Sizing Mistakes Many climbers make the error of choosing pack size based on overall capacity or their clothing size. This approach often leads to poor fit and compromised performance. A large-framed person might need a small backpack if they have a short torso, while a smaller person with a long torso might require a large pack frame. Avoid these common sizing errors: Choosing size based on pack volume rather than torso length Assuming your clothing size correlates with pack size Selecting a pack that "looks right" without proper measurement Ignoring manufacturer-specific sizing variations The Climbing-Specific Fit Equation Climbing places unique demands on backpack fit that differ significantly from hiking or general outdoor activities. Understanding these specific requirements helps you prioritize the right fit characteristics for your climbing objectives. Load Transfer Efficiency Proper fit ensures optimal load transfer from your shoulders to your hips, reducing fatigue and improving endurance during long climbing days. The pack's hipbelt should sit directly on your hipbones (iliac crest), not on your waist or lower back. Key load transfer points: Hip belt alignment: 60-70% of pack weight should transfer to your hips Shoulder strap contact: Even pressure distribution without pressure points Load lifter angle: 45-degree angle from pack to shoulder straps when properly adjusted Sternum strap position: Positioned across your chest without restricting breathing Range of Motion Considerations Climbing requires extensive arm and torso movement, making range of motion a critical fit factor often overlooked in traditional backpack fitting guides. Climbing-specific mobility requirements: Shoulder mobility: Pack shouldn't restrict overhead reaching motions Torso rotation: Ability to twist and turn without pack shifting Forward lean capability: Pack should stay balanced during steep approach sections Dynamic movement: Stable load during jumping, scrambling, or technical moves This mobility requirement is especially important when selecting climbing backpacks designed specifically for technical terrain, where pack stability during dynamic movements can impact safety. Adjustment Systems and Fine-Tuning Modern climbing backpacks feature sophisticated adjustment systems that allow precise fit customization. Understanding how to use these systems effectively transforms a good pack into a perfect pack. Suspension System Components Adjustable Torso Length: Many premium climbing packs feature adjustable suspension systems that accommodate a range of torso lengths. These systems typically involve moving the shoulder harness up or down on the pack frame. Load Lifter Straps: These crucial straps connect the top of the shoulder straps to the upper pack body, controlling the pack's angle and bringing the load closer to your back. Proper adjustment creates a 45-degree angle and significantly improves pack stability. Shoulder Strap Adjustments: Beyond basic length adjustment, many packs offer shoulder strap angle and width customization. Women-specific packs often feature narrower shoulder strap spacing and different strap curvature to accommodate anatomical differences. Hip Belt Customization: The hip belt should wrap around your iliac crest with a slight forward curve. Some packs offer interchangeable hip belts in different sizes, and some premium models feature adjustable hip belt angles. Fine-Tuning for Different Load Weights Your pack's optimal adjustment changes based on load weight and climbing objective. A lightly loaded pack for single-pitch cragging requires different settings than a fully loaded pack for multi-day alpine routes. Light Load Adjustments (under 15 lbs): Loosen hip belt slightly to allow more torso mobility Tighten load lifters to bring pack closer to back Adjust shoulder straps for primary load bearing Position sternum strap lower for better breathing Heavy Load Adjustments (over 25 lbs): Secure hip belt firmly for maximum load transfer Balance load lifters to prevent forward pull Ensure shoulder straps complement rather than compete with hip belt Raise sternum strap for better load distribution This adjustment flexibility is particularly valuable when using fast & light backpacks that need to perform well across varying load weights. Gender-Specific Fit Considerations Men and women typically have different body proportions that affect backpack fit, leading to the development of gender-specific pack designs. Women-Specific Design Features Anatomical Differences: Shorter average torso length Narrower shoulder width Different hip angle and width Higher center of gravity Design Adaptations: Curved shoulder straps that accommodate chest shape Narrower shoulder strap spacing Shorter back panel length for given torso size Hip belt designed for wider hip angle Adjusted load-lifter positioning Unisex vs. Gender-Specific Models While many climbers successfully use unisex packs, gender-specific models often provide superior fit and comfort. The key is understanding whether the design differences align with your specific body proportions rather than making assumptions based on gender alone. Specialized Fit Requirements by Climbing Discipline Different climbing disciplines place varying demands on backpack fit, requiring specific considerations for optimal performance. Sport and Traditional Climbing Single-pitch and multi-pitch traditional climbing often involves extended periods of movement with moderate loads. Fit priorities for trad climbing: Streamlined profile to prevent snagging Stable load during dynamic movements Easy access to gear while wearing the pack Comfortable fit for long approach hikes Traditional climbing backpacks typically prioritize mobility and gear organization over maximum carrying capacity. Alpine and Mountaineering Alpine climbing requires packs that perform well across diverse terrain and varying loads. Alpine-specific fit requirements: Stability during steep terrain navigation Compatibility with climbing harness and other safety equipment Adjustment capability for changing clothing layers Load management for technical sections Ski Touring Ski touring presents unique fit challenges due to the combination of skiing, and varying equipment loads. Ski touring fit considerations: Comfort while skinning uphill Stability during skiing descents Quick access to avalanche safety equipment Integration with ski carry systems Our ski touring backpacks feature specialized suspension systems designed to handle these demands. Professional Fitting and Assessment While understanding fit principles is valuable, nothing replaces a professional fitting session or thorough personal assessment. Self-Assessment Checklist Proper fit indicators: Hip belt sits on hip bones without gaps Shoulder straps contact your shoulders without digging in Load lifters create a 45-degree angle when adjusted Pack feels stable during movement tests No pressure points or hot spots after 30 minutes of wear Full range of motion for climbing movements Warning signs of poor fit: Pain or numbness in shoulders, back, or hips Pack shifts or bounces during movement Difficulty accessing gear or water Restriction of arm or torso movement Uneven wear patterns on straps or pack body Professional Fitting Services Many specialty outdoor retailers offer professional backpack fitting services. These sessions typically include: Load weight simulation with proper weight distribution Adjustment system optimization Movement testing with loaded pack Recommendations for pack modifications or alternatives Fit Maintenance and Long-Term Considerations Proper backpack fit isn't a one-time achievement—it requires ongoing attention and adjustment as your body changes and pack components wear. Regular Fit Assessments Quarterly fit checks should evaluate: Strap adjustment requirements Wear patterns indicating fit issues Changes in body dimensions or flexibility Performance with different load weights Integration with new climbing equipment Integration with Overall Climbing System Backpack fit doesn't exist in isolation—it must integrate seamlessly with your complete climbing system, from harness compatibility to layer management. Understanding how pack fit relates to the broader climbing system is enhanced by our guides on Technical Features Every Climbing Backpack Should Have and Organizing Your Climbing Backpack: Packing Systems for Quick Access. These resources help you optimize not just fit, but the complete relationship between your body, pack, and climbing performance. Whether you're selecting from our comprehensive backpack collection, choosing specialized hiking backpacks for approach-heavy objectives, or considering avalanche airbag backpacks for serious backcountry adventures, proper fit remains the foundation of pack performance. For international climbing trips, consider how pack fit integrates with travel bags designed to protect and transport your climbing equipment while maintaining the organizational systems you've developed. The Investment in Proper Fit Achieving perfect backpack fit requires time, attention, and sometimes financial investment in professional fitting or pack modifications. However, this investment pays dividends in every climbing adventure through improved comfort, enhanced performance, and reduced fatigue. A properly fitted climbing backpack transforms from a necessary burden into a seamless extension of your climbing capability. When your pack fits correctly, you'll climb stronger, longer, and with greater enjoyment, making every vertical adventure more rewarding.
Learn more
How to Choose Backcountry Skis
Here's a guide to better help you choose the type of ski you need when going backcountry skiing. From width, construction and length, we'll try to guide you and find the ski that best suits your needs. ( Read time: 5 min) How to choose Backcountry Skis Over the years, skis have changed a lot. And when it comes to backcountry skis, you can now choose from a large selection with different width, rockers, and construction. When choosing backcountry skis, you want to have a good balance between lightweight, for uphill skiing and performance for the downhill skiing. Light skis are great on the up track and allow you to move faster and retain energy for long periods of time when doing multi-day ski touring or glacier traverse. However, they tend to be deflected more than heavier skis on the descent and when facing harder snow conditions. Ski Width One of the first thing to decide when shopping for backcountry skis is the width that is best suited for the type of skiing you want to do. Usually, a ski that has a width of 95 mm and under at the waist (underfoot) is considered narrow backcountry ski and is best suited for ski mountaineering and glacier traverse. The smaller the waist, the faster the transition from one edge to the other. However, the thinner you go, the more flotation you lose. So if you are considering skiing in deeper or softer snow, you may want to consider to choose a ski that is a little wider. Mid-fat skis, between 95 mm and 110 mm width under foot, is where the majority of people seem to be going when choosing a ski for the backcountry. They provide great all-mountain versatility and with all the new construction technologies these skis show a good balance of lightness, flotation, and downhill performance. You will be able to enjoy them both inbound, at the resort and outbound, when ski touring. Above 110 mm, skis are considered powder-skis. With this waist width, ski flotation will increase significantly and the support you'll get in soft snow will be improved, making skiing in powder a lot easier than with a narrower ski. The downside of the wider skis is that it will be harder to ski on compact snow since the transition from one edge to the other takes more time. And because you'll need more skins to cover the width of the ski, you'll face more resistance against the snow when skinning up. Ski Rocker Type The profile of a ski usually determines how a ski will act in different snow conditions. A rockered ski will make turning in deep snow a lot easier while a more traditional cambered ski will be better at holding an edge on hardpack snow. There is a variety of profile combination out there but here are a few to help you better understand the differences between one another. Early Rise Tip: Helps keep the tip afloat in powder without sacrificing the predictability of a cambered ski. This type of rocker usually comes with a camber underfoot so that when you are skiing on harder snow, you get better edge control. Tip and Tail rocker with Camber underfoot: Usually a playful and versatile ski. The rocker in the tip and tail gives you easy turn entry and exit while the concave shape underfoot gives more edge control. It is ideal if you are going to have only one pair of skis to do-it-all. Full Rocker: Best for deep snow, the fully-rockered ski has a very short contact point they will mostly smear on harder snow conditions but can still be stable, as long as you keep them on edge. The full rocker is usually used on wider skis, meant for deep powder snow. Flat tail: This will make kick-turn and planting skis in the snow a lot easier Ski Length Choosing the right ski length can be a little tricky as there are a few factors to take into account when deciding which size is right for you. Shorter skis tend to make quicker and shorter turns and are easier to maneuver at a slower speed but will lose stability at higher speed. On the other end, longer skis will be a lot more stable at higher speed, but will have a bigger turn radius and will demand more work when engaging in your turn. That being said, in order to choose the right length you have to ask the following questions: What is the shape of your ski? What type of skier are you? What kind of terrain will you be skiing? Shape of your ski: If you are considering an Early Rise Tip ski or one with Tip and Tail Rocker and normal camber, you would generally go with a ski length that will vary between eye and forehead level. However, if you choose a fully rockered ski you will want to get a ski that is roughly the same height as you and up to 5 cm above your head. This is because rockered skis offer a shorter contact point on the snow and by going longer, you will gain stability at higher speed and on harder snow. Your skier's type When you are just starting skiing, or if you are a more cautious skier, going with a shorter ski is usually preferable. Shorter skis are quicker to respond and to easier to maneuver. But keep in mind that when going ski touring, you will most likely be carrying a backpack which will bring your center of gravity a little higher, so if you are going too short, you will feel like you're falling over the tip of your skis when going down steeper terrain. If you are an experienced skier who like to go fast, you'll want to go with a ski that is at least to your eye level. The longer ski length will give you more stability at fast speed and more flotation in deep snow. But keep in mind that with longer skis, kick-turns will be harder to do and it will be more difficult to negotiate turns when skiing tight trees or steep couloirs. Still have questions? Come visit us at the store or send us an email. We can help you find the best ski for your needs. We also have ski demos available for you to try before you buy.
Learn more
Kahl Wall Trip Report - A fun day on Yamnuska
The Kahl Wall. A 280m 5.10a up the eastern side of the main face. The line was originally climbed in 1971 by Don Vockeroth and Tom Auger on aid and then freed by Barry Blanchard and Kevin Doyle ten years later. Mt. Yamnuska: Kahl Wall The name was tribute to the first ascensionists friend and fellow Yamnuska pioneer Heinz Kahl, however Kahl was a play on words as well, meaning “blank” or bare in German, as this was the first route to step out of the obvious corners and lines of weakness and out onto the rather featureless faces of the mountain. The Climb offers a bit of everything from off-width cracks and chimney climbing to techy face and slab sections. With a crux pitch offering bomber rock in combination with lots of bolts for pro, retrofitted belays with ring bolts for an “easy” bailout and fantastic climbing, this three-star classic makes for a perfect intro to the more moderate grades on Yamnuska. Gear Pro: Single rack from micros to #4 and a small selection of nuts. We brought the “standard Yam rack” which consisted of doubles in the mid sizes and full set of stoppers, however very few cams were placed on each pitch, though I think by the time we topped out each one, from black alien- #4 camalot, had been placed. Though we didn’t place many nuts, I would still bring a small selection along. A #5 may have been more ideal than a #4 in some places. Draws/Slings: 13 total - Four draws, four to six alpine draws, four single slings over the shoulder with a biner on each, and one double length shoulder sling. We had taken extras of each of these and it turned out to be far too much gear. Having the draws are nice for the crux pitch where things are well bolted in a relatively straight line, but most of the time bolts and pins were being extended with alpine draws, and gear with single length shoulder slings. A double length runner makes the rope drag more manageable on some of the wandering pitches. Anchors: All the anchors have been retrofitted with two ring bolts, so a couple light wiregates like the CAMP nano22’s on a 120cm sling is plenty with a locker either girth of clove hitched in as a master point (or however you prefer your anchor). Rope(s): Two 60m ropes are always advisable on Yamnuska as bailing out on a single may not be possible or be very difficult, and with a reputation for bad weather to roll over the top without warning, one should always be ready to retreat off this mountain. The added redundancy of two ropes is a good idea as well with the possibility of rock fall or sharp edges compromising the rope. I personally prefer the Mammut Twilight 7.5’s for trad and alpine as they are not only incredibly lightweight but pack small and handle phenomenally as well. Other things to consider: Belay device, 3 locking biners (two for belaying, one personal clove), personal prussik, A small multi-pitch pack each since we’d be walking off the east ridge and not returning to the base of the climb. Though you can take the trail along the base to the bottom of the climb, you risk unnecessary rockfall hazard from other climbers as you walk along the eastern climbs. In the packs we carried first aid, bailout/rescue cordelette, a lightweight storm layer like the OR Helium II, our approach shoes, food, and water. The Climb The Climb is located about 20m right of the climber’s approach trail starting up the obvious corner next to a bolted route just to the lookers left. We had heard the route finding was tricky for the first few pitches of the climb. We double checked the topo a couple of times, but for the most part, the route is fairly straightforward. Pitch One/Two – 5.6/5.8 60m (25m/35m) The first two pitches can be linked up to save time, just be sure to manage rope drag as the second pitch is mostly a traverse. Pitch one starts up an obvious 5.6 corner up to a ledge. We scrambled up a few meters from the base of the wall to gain the corner to give us a little extra rope just in case the 60m wouldn’t make it to the second anchor. Once on the ledge, you’ll see the first anchor, keep traversing left past a piton to a bolt. You may be tempted to move up this corner on what looks like easy climbing here, but continue the traverse left past the bolt around the arete/bulge to the groove mentioned in the guidebook and move up to a large ledge. Move left on the ledge to the set of ring bolts farthest left near the corner (there are two sets of ring bolts on this ledge). Pitch Three – 5.7 40m Move up the corner to a larger ledge, continuing on to a narrower ledge. Trend right to a fairly wide/ steep crack which will take the #4 Cam you brought along. Stem your way up to the next bolt belay just below the chimney. Pitch Four – 5.8 45m Start up the off-width into the chimney and stem your way up. Move out right before the roof onto some easy terrain but beware as this is the choss of the climb. Move up to the ledge and start right, moving down with the ledge, through a slight depression, and up the other side to the next bolted belay. Keep your head game together for this one as there is little to no pro until you’re at this ledge 15-20m above the belay. You may be able to place a wide piece of gear in the chimney, but rope drag will be horrendous, and once out everything seemed too loose to protect safely until the ledge (the guidebook mentions a piton once out of the chimney that I may have missed). Pitch Five – 5.8 30m The topo in the guidebook was a little misleading here, showing the start of the pitch being out to the right of the anchor by the trees and straight up being the start of pitch four on Bringers of the Dawn, however the bolt line slightly left of the anchor is Bringers of the Dawn with the fifth pitch of Kahl Wall being almost directly above the belay. It also shows what looks like a bit of a traverse at the top before reaching the anchor, but you'll find it more or less goes straight up, while trending right in places. Move up the corner above the belay past a bolt and moving right at the piton onto the face. Go up the left facing corner and top out on a small belay stance below a bolted line. Pitch Six – 5.10a 35m This is the first crux pitch and for some the most enjoyable as the techier moves on thin holds more resemble a day at the crag than a wrestling match with the mountain. It is bolted quite well with a piece of gear or two in solid rock. This pitch very straightforward, following bolts up to a corner, then moving right out onto a slab below a roof. Move up the slab to a bolt and move left back into the corner and make a couple steep moves to the belay ledge. Stellar! Pitch Seven – 5.10a 30m Less sustained than the last pitch, make a couple of steep moves up the corner from the belay ledge. Place a 3” piece here, extended by a double length sling, before it steepens and make an exposed traverse right (though not polished, the amount of shoe rubber left behind should make it obvious) to a groove. Move up from here on easier climbing to a water runnel with a piton and some bolts above and follow up to the belay below the large corner above. Pitch Eight – 5.8 45m Starting off fairly easy follow the large corner right of the belay. The upper section, however, gets quite steep for the grade. Stem your way around the roof into the corner and left to the belay. The start takes gear quite well, however, the upper section doesn’t protect as nicely as it gets quite wide (tipped out #4, probably could’ve taken a #5). Pitch Nine – 5.9 20m Very fun, but short-lived climbing for the grade. We had brought a #4 cam however a #5 would’ve been more ideal. Move up the wide/steep crack in the corner, finding a home for your large cam before pulling on a nice jug (if it is still there. Was quite loose) to move up to the tat (chock). Pull the roof off of a beautiful fist jam and continue up a few meters of easy terrain to the last anchor. Descent Walk off the back side and follow the east ridge hikers trail back to the parking lot. This is quicker and safer than walking along the base back to the approach trail. If you’re not used to the style of climbing you may find some of the corners interesting, where style points go out the window as you shove body parts into the mountain and wrestle your way up corners rather than delicately dancing up your local sports crag. Nonetheless, it’s a full value adventure day that’ll have you coming back to the mountain for more. With its fantastic rock quality, luxurious belay ledges and fun climbing, it’s no wonder the Kahl Wall earned its three-star Yam rating. An absolute must do! Hit it Thursday through Saturday and take advantage of the awesome buffet at Stoney Nakoda afterward! Climbing is dangerous and posses inherent risk. It is your responsibility to seek proper instruction from qualified professionals to learn the necessary skills to participate in any of the activities described herein. The information found here is for entertainment and general information purposes only and does not constitute advice, nor is it intended to be educational in any way.
Learn more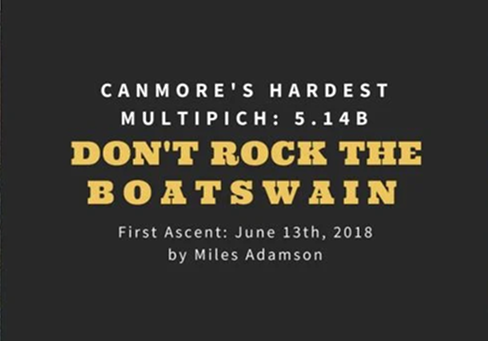
Canmore's Hardest Multipitch: Don't Rock the Boatswain, 5.14b
A new milestone in the Canmore's Climbing history was achieved yesterday, June 13th 2018. Miles Adamson climbed one of the hardest Canadian multipitch: Don't Rock the Boatswain, 5.14b. This route is located on Grotto Mountain, in Canmore, Alberta. FA of P1-P6: Miles Adamson and Zach Watson, September 2017 FA of P7: Miles Adamson, June 2018 History Zach Watson and I started bolting Don’t Rock the Boatswain in 2012, and it took 5 years to complete. We didn’t get to put too many days into it each year because I lived in Edmonton and was heading to university in BC, and Zach was going to school out east. In September of 2017, we did the first ascent of the first six pitches. They consist of one 5.11, a 13a, and then four 5.12’s in a row. The final roof we bolted was incredibly difficult. When Zach bolted the last couple meters, he wasn’t sure if what he bolted was possible to climb. We were worried that bolts would need to be moved for the line to go, but still I attempted it last year in September. The moves, I could barely do individually, but I knew the line did go but at least at a solid 5.14 grade. Yesterday, I went up again to attempt the roof, and sent it on my 3rd try of the day, for its first ascent. I’ve proposed a grade of 14b, which puts it among the hardest multi-pitch climbs in Canada. The route had to be bolted on lead because the top of the cliff was too dangerous to access from the top of Grotto Mountain. Even if you hiked all the way up the back, there are huge scree slopes above the cliff which might slide on someone trying to walk towards the edge. To bolt, we mostly drilled from free stances. This means we literally just held on with the drill to put in bolts. The drill we would put on a sling clipped to a gear loop. The bolts were attached to quickdraws, with the nut tight onto the hanger so they didn’t fall off. To drill, we just took the drill off when we got a good stance and pressed into the rock where we tested was good with a hammer. The bolt would go in finger tight, just enough to stay there. Then it would get hammered in enough to clip it and take. From there, we would adjust the nut to the end of the bolt to finish hammering it in, tightened it with the wrench and it was done. The hardest parts of the route we had to just go bolt to bolt, by putting in one from a take as high as we could. Challenges Climbing uncleaned rock with a drill was extremely difficult, as we would often need to bash blocks with a hammer before proceeding. We had a plan of where the anchors would be based on what ledges we could see from the ground, but it was still very exploratory. We were trying to bolt up the many roofs and features in a logical way, connecting the best rock without accidently hitting a totally blank or loose section. At one point bolting the 13a pitch, I had passed the hardest terrain and was on an easier section. I did quite a few moves above my last bolt and got a large jug. Really pumped, I went in direct on it with an aid hook. As I started drilling and pressed into the rock, the force out broke the hold I was hooking on. The hold hit me in the helmet and I fell around 6m with the drill in my hands, onto my last bolt. Thankfully, the route is very steep and the fall was clean, even with the drill in my hands. The final roof is very much my style, steep compression needing tension on the footholds. It has several moves requiring heel hooks and toe hooks in the roof to avoid foot cuts on the poor handholds. I had attempted it in September when Zach and I had sent the original line, but could barely do the moves. Zach had no interest in projecting the final roof, but I always had the vision to come back eventually. Over the winter I trained a huge amount, not specifically for this but for a bouldering trip. After the trip, I changed gears to route training. Coming back much stronger than before, I sent the roof pitch on my 3rd attempt of the day. The route is now complete, and Zach has already started bolting a new multipitch to the side. The new line appears to be much easier and should turn out to be a great moderate outing. Don't Rock the what? A Boatswain is a hanging platform attached to an anchor. We made three wooden ones out of 2x12’s and cord. They are still hanging on the route at the anchors with the most uncomfortable belays. Approach Park at the Rat's Net Cave parking area, follow the trail for The Playground/Rat’s Nest Cave for approximately 10 minutes to a fork, on the left, that leads to a powerline. Follow the powerline West, down to where a trail turns right into the forest. Follow this trail and an old road until you reach the drainage below the canyon. Follow the drainage until you reach the route near the base of a ramp angling up and to the right and find the climb, front and center, at the back of the canyon. Pitch 1: 11c/R 12 bolts Attempt to belay this pitch from a protected location like the alcove down and right. Climb through several slabs and a bulge crux. Several moves with bad feet are far above the last bolt and potentially have a fall consequence. Pull a crux after a small roof to a significant run out, leading to a crumbly ledge with the anchor. Pitch 2: 13a 12 bolts Climb the massive flake sitting on the ledge to the first bolt, and continue straight up through amazing rock. The roof has a powerful crux. Above, some tricky sequences lead through a corner and to the anchor. Pitch 3: 12c 19 bolts Climb up and right of the anchor, somewhat above the belay. Then, immediately left through some cryptic climbing to a beautiful corner and finally a difficult slab. The belay is hanging, perfect for boatswains. Pitch 4: 12b 13 bolts Traverse right from the anchor. A large sideways move with poor feet gains you passage past the 2nd bolt. It eases off before another large move, which leads to much easier, but run out terrain above. The 5.10 layback flakes are incredible and lead to the largest ledge on the route. Belay your second from the anchor above the pitch, but traverse left to the anchor on the far side of the ledge to belay the next. Pitch 5: 12b 9 bolts Traverse straight left, past a giant block and some hollow sounding flakes. Continue straight up through a short boulder problem that leads to a corner and mantle to the next anchor. Pitch 6 (Finish of Original Route): 12a 10 bolts The moves at the first and second bolts are the hardest, the second was stick clipped on the first ascent to avoid hitting the ledge. After, it eases and you gain small anchor ledge just below the imposing roof. Pitch 7 (aka Don’t Rock the Boatswain Extension): 14b 16 bolts Traverse left around a sharp arete. Be extremely cautious of your rope tightening on this arete from a fall, extend draws as needed (especially the first 4, which can also be back-cleaned). Move awkwardly into an overhanging corner, and layback it to a good rest. Directly out of the rest, bust out onto the roof with underclings, compression moves and tension. Climb all the way to the lip of the wall past 2 fixed draws and mantle it. Finish by standing on top of the wall. This pitch cannot have an anchor over the lip due to the logistics of the rope tightening over the sharp lip of the wall. To get down, go back to the last fixed draw and lower off of them to clean your gear. Descent To rap the route you need two 70m ropes. From the top of the 5th pitch rap all the way to the top of the 3rd. Avoid rappelling from the large ledge (end of pitch 4) as ropes may get stuck or be very hard to pull.
Learn more
Fun Ridge Route in Canmore - Mount Lady MacDonald's West Ridge
Want to be alone on one of the most popular peaks in the area? This route's for you. Here's my trip report with tips on what to bring and what to expect, pitch by pitch. Mount Lady MacDonald is an obvious objective, to say the least. Its summit looms almost 1300 vertical meters over the town of Canmore. The trail up the peak is one of the most popular around.
Learn more
Early Season Rock Climbing - Where to go and what to know
Every winter it's the same, we get crazy cold temperatures for a couple of weeks (a month as of last February), and then out of no where, we'll get a few days or weeks of really nice temperature - usually above 10°C - when you'll see everyone around town get their flip-flops out, and their bikes, and also their ropes in order to hit the nearest crag. In order to help you choose where to go, we did a short list of the crags to check out when the weather gets nice again.
Learn more
A Skaha Guide for Spring Climbing
We get it, you’ve been stuck climbing in the gym all winter. You're tired of the crowds, that weird foot smell that all gyms have, and the feelings of inadequacy as you get smacked around by routes made out of plastic. Suddenly its April, and you're at your breaking point, you NEED to climb some honest to god rock, but it’s spring in the Bow Valley and the weather is rapidly changing from 15°C in the sun to 2°C and snowing .
Learn more
Climbing with kids - Family fun at the crag
If there is one thing climbing parents can’t wait for, besides a real good night sleep, is the first time they will get their little ones on the rock. My kids are now in their teens, so I decided to use my journey to help you benefit from the things that went well and hopefully, help you avoid the things that did not go so well.
Learn more